
I have a ton of experience in Finance and Operations, but the blocking and tackling of Dynamics 365 Business Central has been something I’ve been able to blissfully avoid for the entirety of my professional life. That’s changed. Here’s one of the first things I learned.
Long story short, I’m trying to use the native consolidation features in Business Central to consolidate a few companies together. To figure out how to do that, like everyone in the world, I popped over to YouTube and found a great video.
As I was following around, two things popped up. First, the presenter was referring to “Account schedules”. They look like Management Reporter financial reports to me, but I digress. Regardless, I couldn’t find anything about account schedules searching BC. Back to Google. Apparently, this functionality has been renamed to Financial Reporting (just like MR in Finance and Operations!). Ok. Back to the video.
Financial reporting replaces account schedules | Microsoft Learn
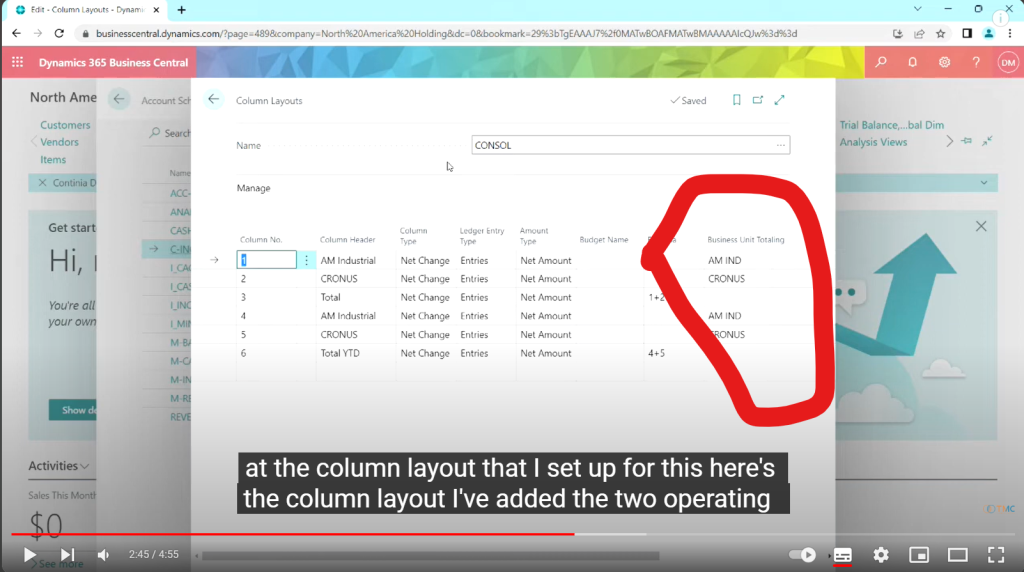
Just like the reporting tree functionality in Management Reporter, the screenshot the speaker was showing had the “Business unit totaling” field to allow him to enter a specific business unit in the column definition.
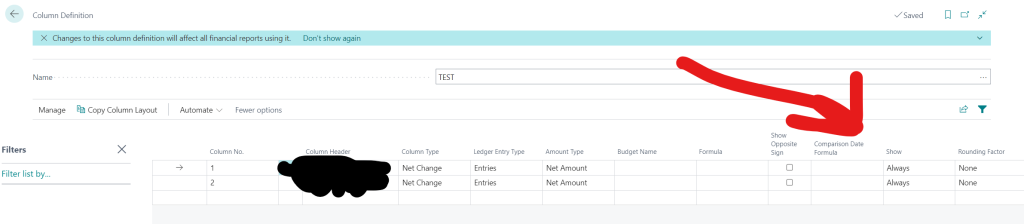
Mine didn’t have that.
I was confused. I thought to myself “maybe this field is controlled by a role or something”? I looked around and figured out how to change my user to the “Accountant” role and went and checked. Didn’t work. Then I thought “maybe it’s just hidden and I can personalize this form somehow”. Bingo. Just like in Finance and Operations, you can personalize forms and add existing table fields to the form through a personalization screen.
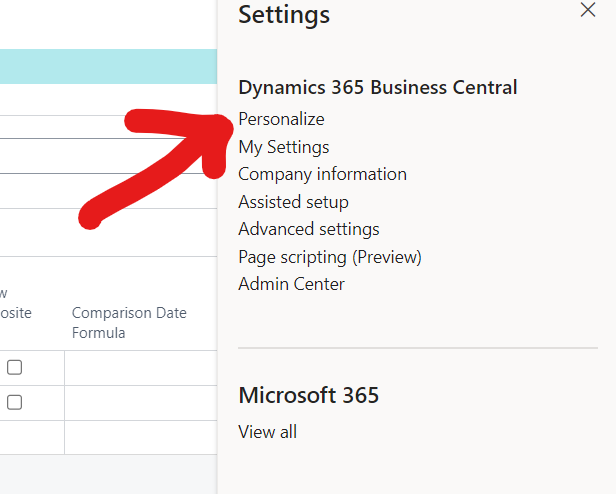
To do this, open the form you want to personalize. In my case, it was the “Column definition” form. Then, click the gear icon in the upper right and click “Personalize”.
When you click the “personalize” button, a little second ribbon will pop up below your primary ribbon bar. Click the “+ Field” button and a list of available fields will display on the right side of the screen.
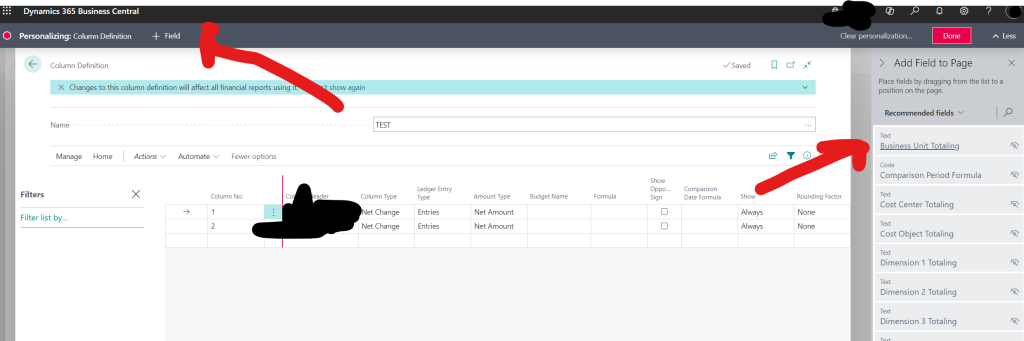
Find the field you want to add “in my case, Business Unit Totaling, and drag it to where you want it on the form (pick a spot between two column headers and wait until the cursor turns into a red line before you drop it). Click “Done” et voila!
If you screw it all up too bad, just go back to the form, click the “personalize” button in the gear again, and click the “Clear personalization” button next to the “Done” button, select “All” in the context menu that pops up, and you’ll revert to the base form.
Hope this helps!
Leave a Reply