
Back to Business Central. Similar to Finance and Operations, the out-of-the-box business documents (sales invoices, in this case), leave much to desired. Thankfully, UNLIKE Finance and Operations, Business Central has a pretty straightforward way to handling customizations of these reports.
I wanted to use the Word-based reports instead of dealing with customizing Reporting Services reports. If you want to do this, you first find the appropriate starting point, export the template, and then change it to your heart’s desire.
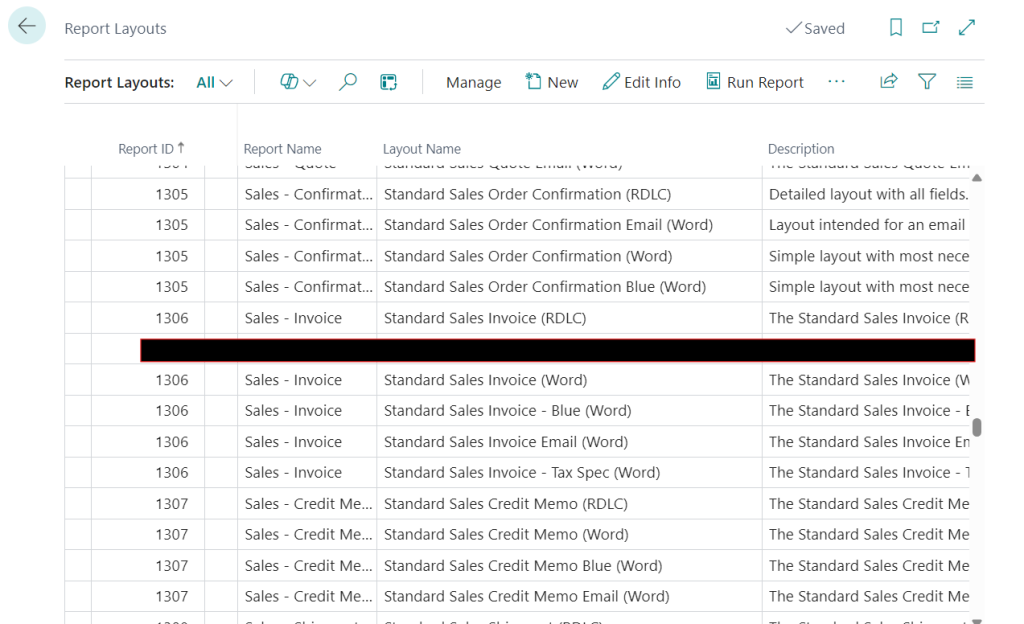
The sales invoice was my target. I found report ID 1306 in the “Reports layout”, selected one of the Word layouts, and then clicked the “Export layout” button in the ribbon bar. Here’s some standard instructions for editing these reports.
Enable the “Developer” tab
Tip #1 for dealing with these reports – make sure you have the “Developer” tab enabled in your ribbon bar in Word. If you don’t go to “File”–>”Options”–>”Customize Ribbon” and check the “Developer” option in the “Customize the Ribbon” menu.

The Word-based report layout templates use XML content to serve as placeholders for when the report runs. BC then merges the template with an XML output that has the values from the document you’re generating, and it produces an output with the appropriate values filled in. What this means is, if you want to change something, all you do is change the XML references in the template and update the report layout in BC.
This was easier said than done. To see the XML schema, with the template opened in Word, click the “XML mapping pane” in the “Developer” tab of the ribbon bar. After clicking through until you find the right Custom XML option, you’ll see something like this:
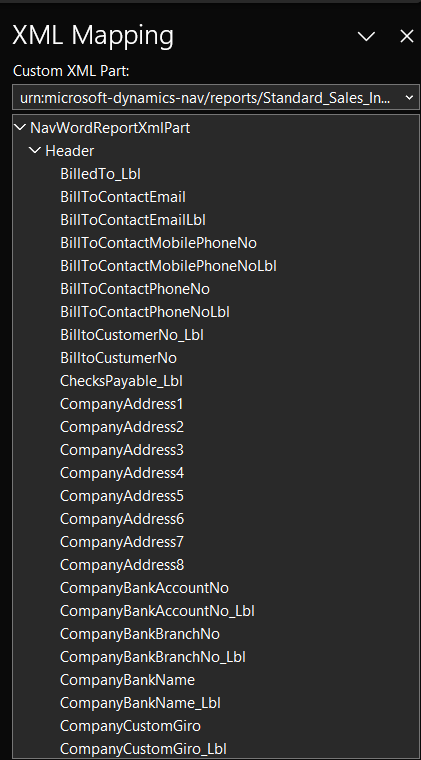
There’s nodes for the header, lines, totals, tax information, and a few other miscellaneous subgroupings of data. Some of the field names are pretty self-explanatory, but some of them aren’t. It’s also not real straightforward to look at the sales invoice form inside BC and map it directly to the XML output.
Generate a full XML document
But no fear, here comes tip #2. If you want to see a whole XML document for your report layout you’re trying to build, use the “Send to” function inside BC.
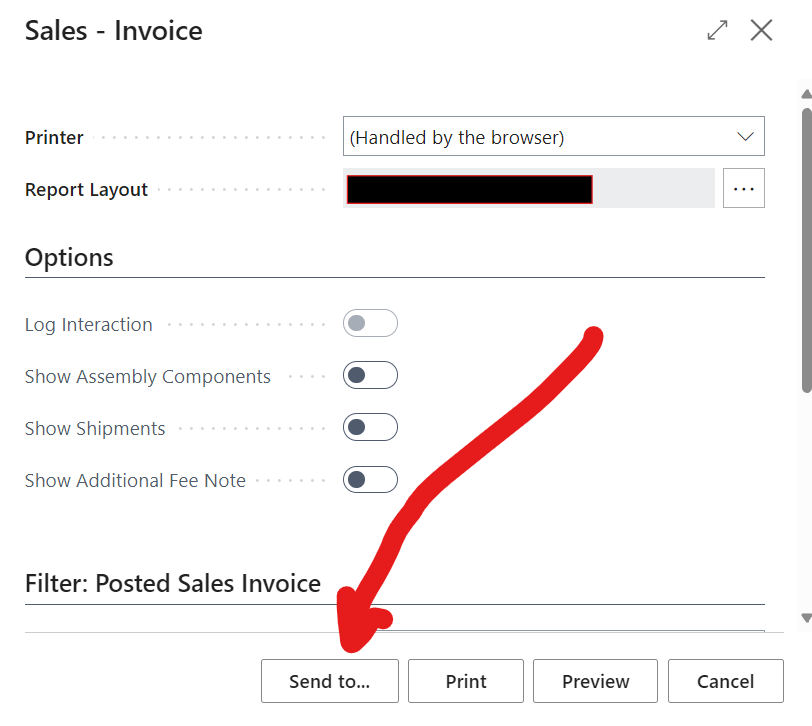
Try to print the document you’re updating. Before you hit “Print” or “Preview”, click the “Send to…” button instead. This will display a dialog box – select “XML document” and click “OK”.
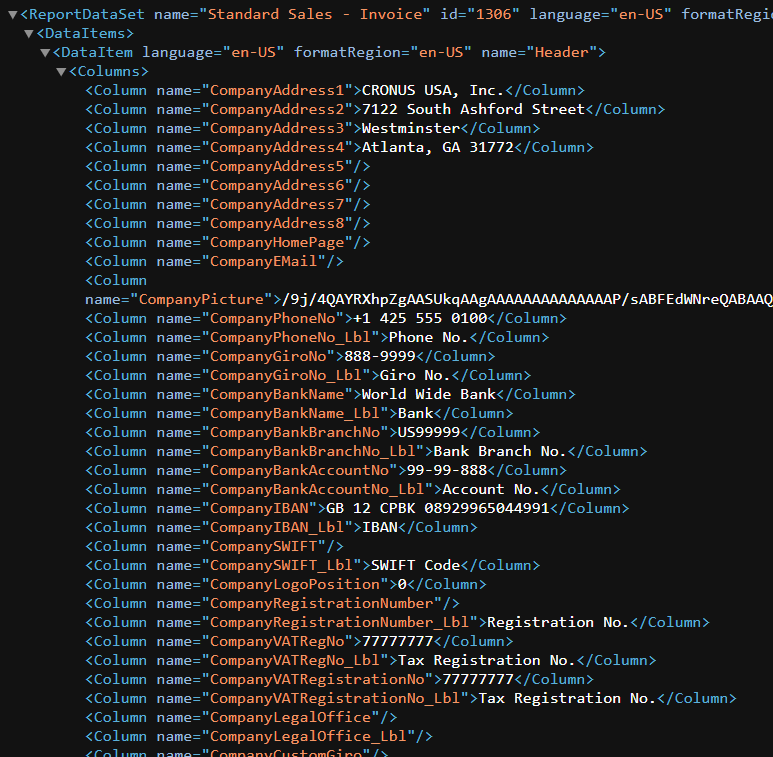
This function will generate a fully populated XML document for you. You can open this up in Chrome or Edge and take a look at each of the fields in order to validate the ones you selected in your template update. This should save you from hunting and pecking through the numerous fields and help you get to what you’re looking for faster.
Happy updating!
Leave a Reply