

I’m trying to build some Power BI reports using Business Central general ledger data. First attempt at doing this was to connect Power BI to the Business Central connector and using the G_Lentries web service.

This was working just fine for a while. However, I ran into a snag.
During my data migration, I ended up having to cancel a year-end close. While this resulted in accurate numbers inside BC and the canned reports from the system worked, I was seeing a few issues inside the Power BI reports using the G_LEntries entity.
I needed to filter out some year-end close entries, but there wasn’t enough data provided by the entity to differentiate between the correct data and the reversed data. I needed to make a change.
Adding the G/L entities description field
Looking in the table browser (you can see more about this at How to integrate Mercury bank with Dynamics 365 Business Central), I was able to see that there is a “description” field on the G/L entities table with “Close Income Statement” that I wanted to exclude in order for my report to be accurate.
So what to do, what to do… I looked through all the other entities I could find, and I didn’t see that field anywhere. So I decided to build my own entity and make sure that field was on it.
Looking through the documentation, YouTube videos, and blog posts, it wasn’t really clear to me how to start. In fact, disclaimer, I have no idea what I’m doing and I probably didn’t do this right. Would love to hear some feedback on the best way to do things.
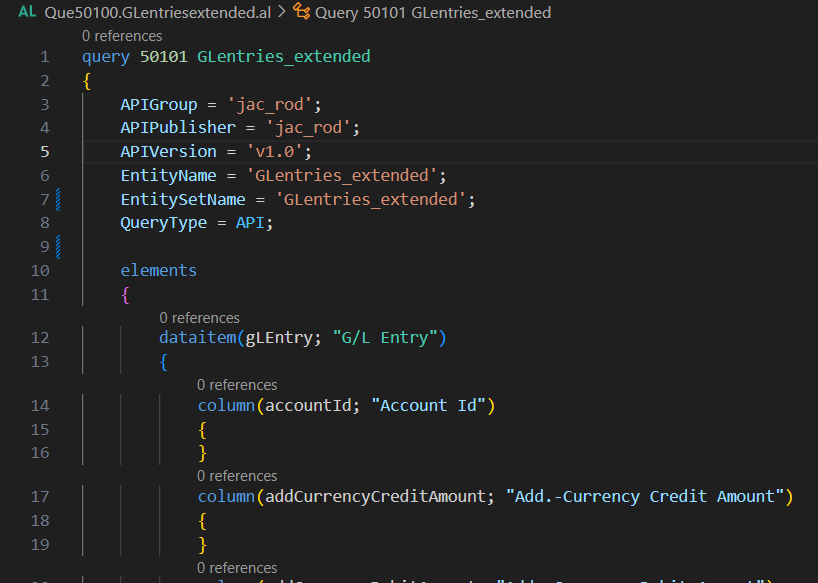
I mean, I used AL:Go! in VScode to create a new project, created a new entity based on the G/L entry table which included all the fields using the new object wizard, and then ran the project from VScode.

This opened the new entity in a sandbox, but I wasn’t sure what to do after that. Also, I’m much more familiar with the ALM process in Dynamics 365 Finance and Ops, so I was looking for something similar. Here’s where I ended up.
ALM story for Dynamics 365 Business Central
- Step 1 – Create a new project using AL:Go! in VSCode
- Step 2 – Create whatever extensions or custom code you need to build
- Step 3 – Run the code in a sandbox environment using F5 in VSCode
- Step 4 – Deploy the code to a non-production environment
- Use the “AL:Publish without debugging” function from the AL language extension.
- Step 5 – TEST
- In my case, I was creating a new entity and I needed to add it to web services list page and then connect to it using Power BI
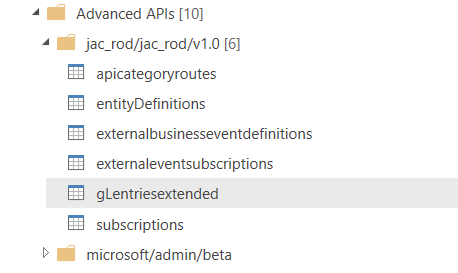
- Took me a while to figure out exactly how to name the API, the entity set, and the entity set name in order for it to appear in the correct node of the web services list when connecting via Power BI
- Step 6 – Create a package
- Use the “AL:Package” function
- This will build an extension package in your projects directory
- Step 7 – Upload the package to production
- This is done in the “Extension Management” form
- Click the “Upload extension” button
- Step 8 – Publish the package in production
- Also done in “Extension Managment”
- Click the “Install” button after the package is uploaded
- It’ll give you a choice to either install immediately or include it during the next minor / major update
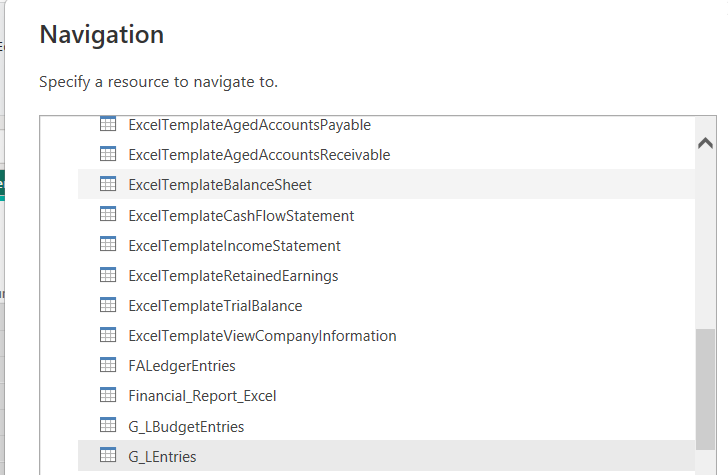
After I did all that, I was able to see my new entity in Power BI in just the spot I wanted it.

This feels like developing in X++ and moving things around using project files. Doesn’t seem very bulletproof and there seems to be lots of risk of screwing things up, so I’m sure there’s a better way to do this. If there is, though, it’s not the easiest documentation or process to find.
Hope this helps.

Leave a Reply Cancel reply